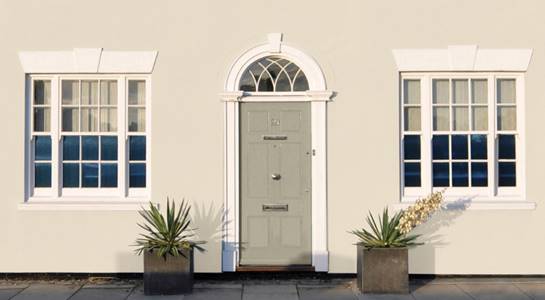
Choosing the Right Masonry Paint
Sandtex Ultra Smooth Masonry Paint provides protection against weather erosion together with a flawless finish to most masonry surfaces. Its smooth, creamy consistency allows it to be easily applied to large areas and, due to the quality of the paint, only two coats are usually necessary. Furthermore, with its special microseal technology, the paint is dirt resistant, breathable, waterproof and therefore ultimately more durable, giving your home a smart exterior (and you, peace of mind) for up to 15 years!
Other alternatives are:
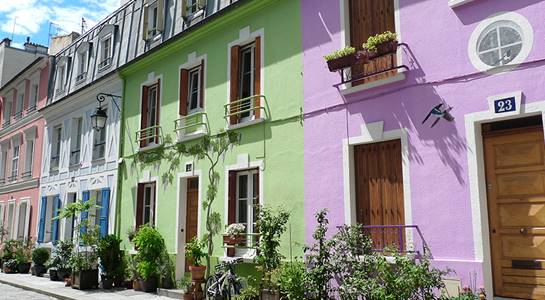
Colours
The Sandex Ultra Smooth range offers the largest selection of colours, boasting 25 different shades, each one a calming, natural tone set to compliment any surroundings. From the pale green hue of ‘Cotton Belt’ to the hearty, deep warmth of ‘Brick Red’ there is a shade of paint to suit every taste. If you’re undecided on a colour, you could invest in a few tester pots? Simply paint a small amount of each colour onto a piece of plasterboard or card, and hold them up against your walls so you can view them in natural daylight before you make your final decision?
Preparation
The key to achieving a high spec, long-lasting finish is all in the preparation. In order for the paint to be most effective, surfaces need to be sound, clean and dry before the paint is applied. Why not follow our step-by-step guide on how to prepare your outside walls for their makeover this summer?
Step 1 – Clean
Clean the walls with a stiff bristle brush or wire brush, to remove any loose dirt, flaking paint or crumbling masonry. Any mould or algae on the surface of the walls must be properly removed and treated with appropriate chemical substances where necessary.
Step 2 – Repair
Any holes or cracks need to be filled with an exterior filler, and rubbed down with sandpaper until smooth.
Step 3 – Seal/Prime
Powdery, chalky walls will have to be sealed with a good masonry primer, to ensure
application of the paint is as even and fluid as possible.
Painting Exterior Walls
Once your outside surface is fully prepared, you are ready to begin painting! Peruse our top tips on how to paint your outside walls, and then sit back, relax and enjoy years of immaculate coverage on your house exterior…
Tip 1 – Watch the Weather
As far as is possible in this ‘green and pleasant Isle’, try to plan your painting spree to coincide with two or three days of fine and dry weather to ensure you are not interrupted mid-flow with a torrential downpour!
Tip 2 – Trusty Tools
Be sure to gather all the tools and equipment you will require to complete the job, before you start. A strong, sturdy ladder, good quality masonry brushes varying in size, and a roller (remembering to consider the possibility of an extendable handle to help you cover those hard-to-reach areas.) Bear in mind that a paint kettle/canister may be of use when you’re working on the top half of your house. It might also be a good idea to mask door and window frames, and wrap any drainpipes in newspaper so you can cut in without worrying about accidental paint splashes.
Tip 3 – Top to Tail
Mentally divide the wall into smaller, more manageable sections and complete these one at a time. It’s always best to begin at the top of the wall and work down, so as to ensure those inevitable paint dribbles don’t affect completed paintwork.
Tip 4 – Smooth Strokes
Load your brush or roller up with enough paint to ensure a strong, thick coat without applying so much that drips and runs occur. Quick, smooth strokes will give the optimum finish as applying fresh paint over partially dried paint can cause flaking and mar the finished appearance. Use a smaller brush to cut in to corners and crevices as you would do on interior walls, and a roller to cover those larger, flatter areas.
Tip 4 – Drying Time
Allow 3-4 hours and ensure that the paint is thoroughly dry before applying your second coat.
Once you’ve followed these simple steps this summer, your house is sure to stand out as the smartest on the street. So, go on, what are you waiting for?!